
⚡ GMapsBook.com is crafted by Jozef Sorocin (🟢 Book a consulting hour) and powered by:
- Spatialized.io (Elasticsearch & Google Maps consulting).
- and Garages-Near-Me.com (Effortless parking across Germany)
The materials presented in this chapter deal with low-level APIs. If you’re using a framework like React or Angular, make sure to check out the chapter on Working with Frameworks.
ScenarioApproachAccessible custom markersIntroduction to InfoWindowsStyling mechanismsConnecting markers with info windowsOverriding default content stylingFully custom close buttonTapping into the open and close eventsOnly one info window at a timePutting it all togetherBonus: Positioning a fully custom DOM tooltip
Map markers represent points of interest (POIs). But these POIs likely contain more information than just the geo position:
- If you’re building a store locator, you’ll want to display the stores’ precise address, opening hours, and overall rating.
- If you’re implementing real estate search, you’ll want to preview the listing’s photos, beds & baths, and price.
Since this extra information won’t fit inside the marker label (pin), you have a few options:
- You can go with a modal but modals interrupt the user’s workflow.
- You can present the information in a side panel (just like maps.google.com itself) but side panels consume valuable screen real estate. More importantly, side panels aren’t SEO-friendly — unless clicking on the marker replaces the URL with the applicable href.
- Or, you can connect marker clicks to info windows (also called info bubbles or popups). This way, the information remains geographically contextualized and the user’s workflow isn’t interrupted. Naturally, you can link the info window content to a dedicated, SEO-friendly permalink.
Scenario
I’m building a real estate search website. I already have a map containing custom markers.
Now I need custom info windows to display the listing title, main photo, and price:
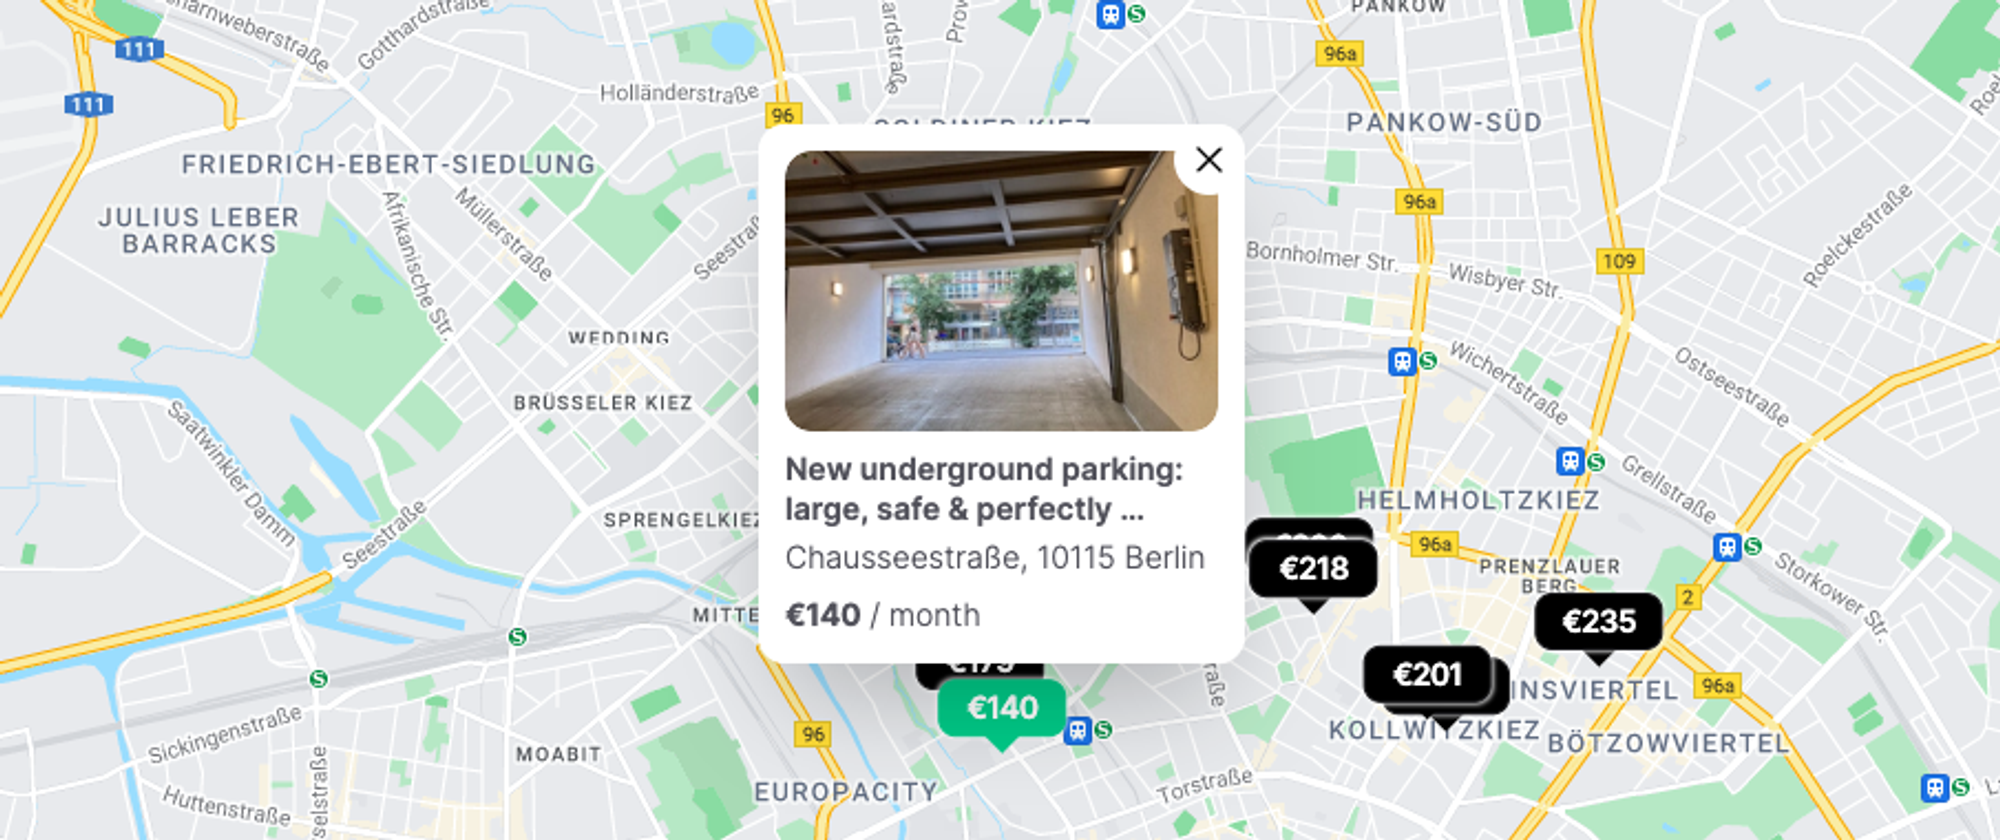
Also, I want my markers & info windows to be accessible to screen readers and keyboards:
Approach
Accessible custom markers
Assuming the following listings data structure:
[
	{
		"title": "New underground parking: large, safe & perfectly located",
		"price": "€140",
		"photo": "https://...",
		"address": "Rienzistraße, 10318 Berlin",
		"position": {
		   "lat": 52.4900596,
		   "lng": 13.5157737
		}
	},
	{ ... }
]
you can easily implement dynamic SVG marker labels:
./svg.ts
export const generateSvgMarkup = (price: string) => `
<svg width="71"
     height="45"
     viewBox="0 0 71 45"
     fill="none"
     xmlns="http://www.w3.org/2000/svg">
    <rect width="71"
          height="37"
          rx="10"
          fill="#010101" />
    <path d="M35 45L27 37H43L35 45Z"
          fill="#010101" />
    <text x="34"
          y="23"
          font-size="16px"
          font-family="system-ui"
          text-anchor="middle"
          fill="#FFFFFF"
          font-weight="bold">
        ${price}
    </text>
</svg>`;

/**
 * Given a `rawSvgString` like `<svg>...</svg>`, return its URI-encoded representation.
 * @param {string} rawSvgString
 */
export function encodeSVG(rawSvgString: string): string {
  const symbols = /[\r\n%#()<>?\[\\\]^`{|}]/g;

  // Use single quotes instead of double to avoid URI encoding
  rawSvgString = rawSvgString
    .replace(/'/g, '"')
    .replace(/>\s+</g, '><')
    .replace(/\s{2,}/g, ' ');

  return (
    'data:image/svg+xml;utf-8,' +
    rawSvgString.replace(symbols, encodeURIComponent)
  );
}
Now, as pointed out in Custom Marker Labels, markers can be made accessible through the
title property and by setting optimized to false. This way,the click listener causes the marker to have button semantics, which can be accessed using keyboard navigation and via screen readers.
So, running:
import { listings } from './listings';
import { encodeSVG, generateSvgMarkup } from './svg';
for (const listing of listings) {
const marker = new google.maps.Marker({
map,
position: listing.position,
icon: {
url: encodeSVG(generateSvgMarkup(listing.price)),
scaledSize: new google.maps.Size(55, 35),
anchor: new google.maps.Point(27, 35),
},
title: listing.title,
optimized: false,
});
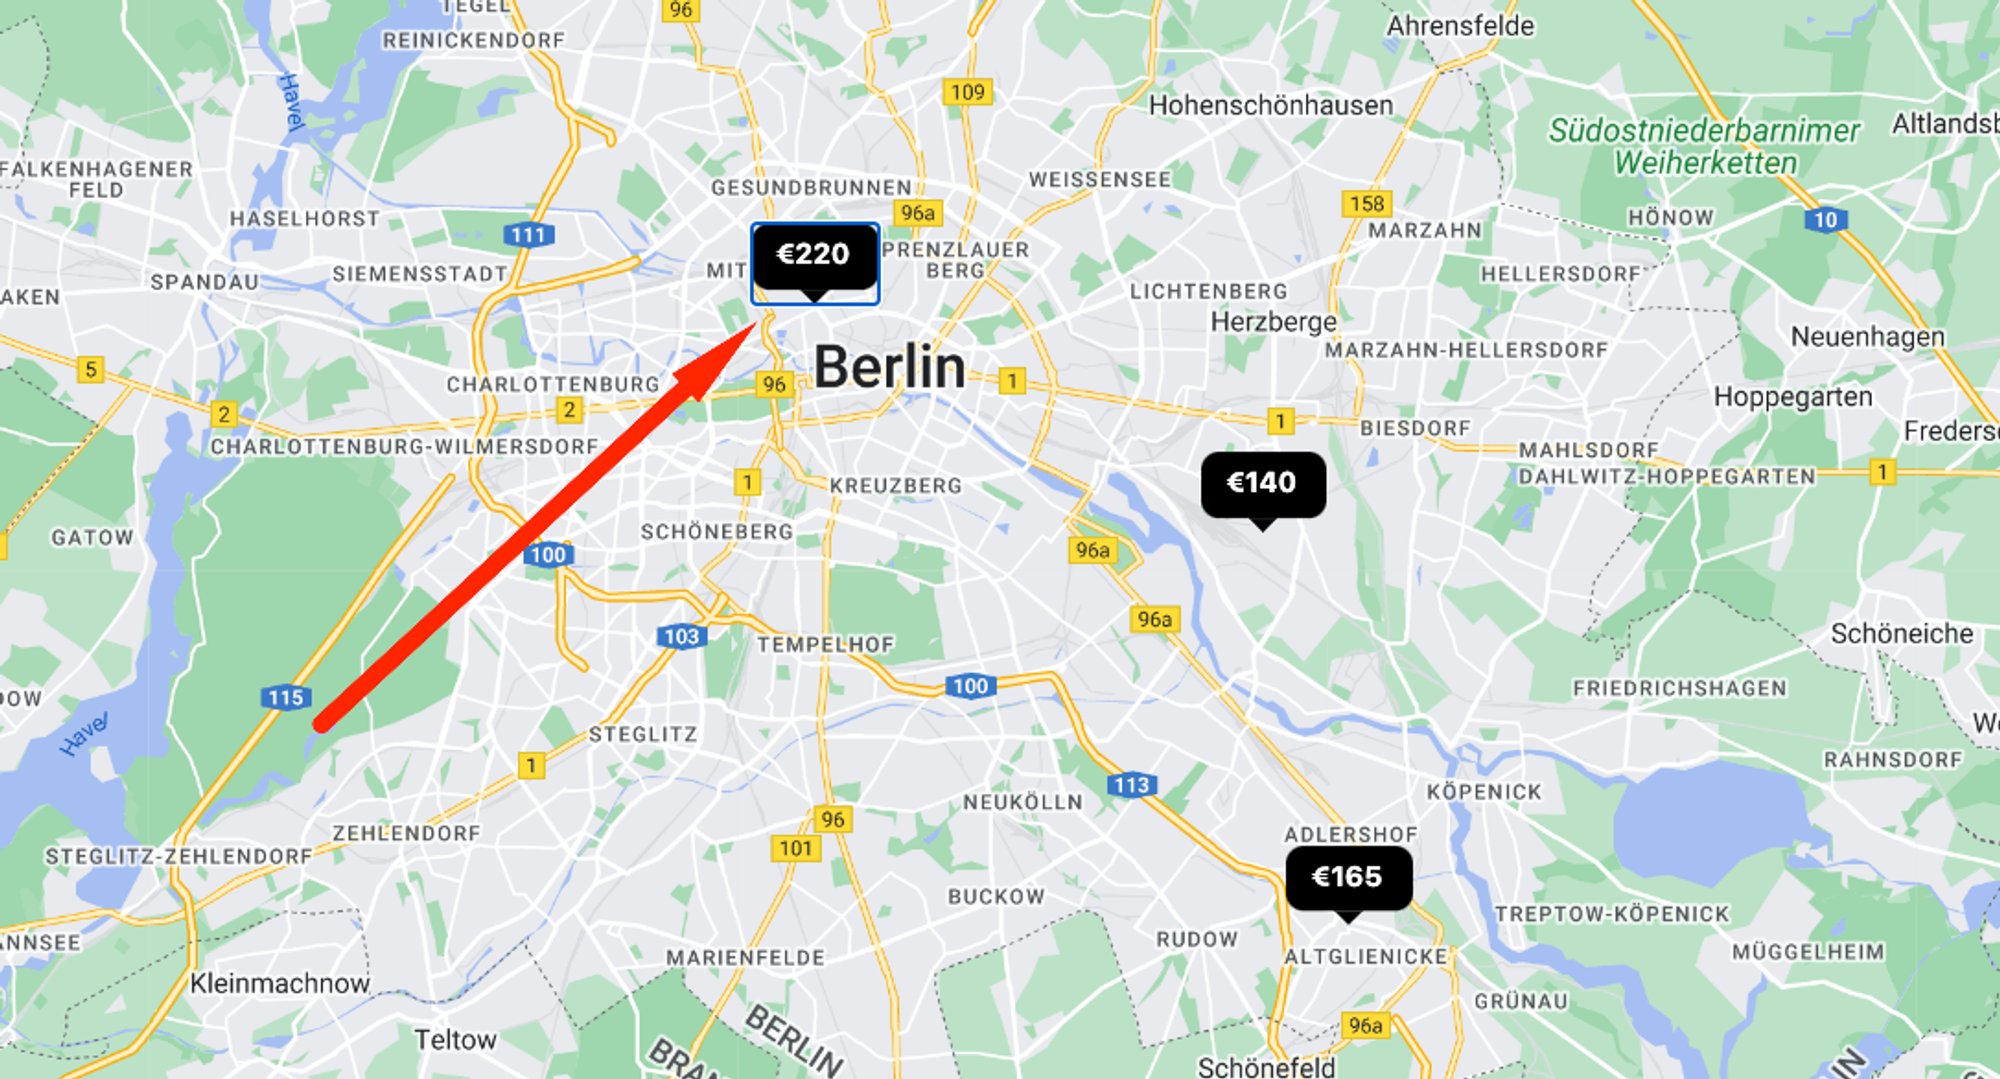
}renders custom, yet focusable and clickable markers:
Introduction to InfoWindows
Once the clickable markers are ready, it’s time to connect them to
InfoWindows.When constructing one, it’s customary to provide:
- an
ariaLabeldescribing its content
- and the actual HTML
contentto render inside the info window wrapper.
The
content can be generated using modern HTML via template literals (`This renders a ${var}`) or a templating engine like handlebars.js:const infowindow = new google.maps.InfoWindow({
ariaLabel: `Info window for ${listing.title}. Click to open its dedicated page.`,
content: `< div class="p-3 bg-white rounded-xl w-[220px]">
...
${listing.title}
...
${listing.price}
</div>`
});Styling mechanisms
Since the HTML
`
});content will be injected into the website’s DOM, you can style it using CSS — unlike SVG markers which are already encoded and passed in as Data URLs.In other words, you can either inject a
<style> tag as part of the content:const infowindow = new google.maps.InfoWindow({
...
content: `
< style>.infowindow-content { background: yellow; }
< div class="infowindow-content">...Or use targeted selectors in your site’s CSS, e.g.:
#map .infowindow-content {
	background: yellow;
}